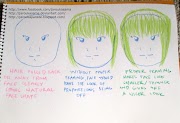
^Ordering wigs online is the easiest and best way to get the closest possible match for a character when you want to cosplay. But sometimes, for some reason or another that this doesn't work out, we have no choice but work with what we have.
One of the biggest problems we have is when we cant find the right colored wig.
Here is a tutorial I found 2 years ago, and I have been using it when ever I am in a pinch. So far, it has never failed me.
Biggest thanks to Fire Lily for making and sharing this tut.
As per usual, I am not the owner or the creator of this tutorial, I am NOT claiming this as my own. This has worked wonderfully well for me and I am hoping that this can help some one out, too. Many many thanks Fire Lily!
I have added some notes specifically for people in the Philippines, just to better help you guys out.
But if you want to know more, I think it is best that you ask Fire Lily herself. Be not afraid, she is very nice. =)
Anyway, to the NOTES:
- *For clarification, Sharpie is a brand. XD
- *If you can't find Sharpies that are the right color, it is either you mix colors to get the one that you want (this is very fun hehehehe) OR you get another brand of PERMANENT MARKERS. Go for permanent markers and not white board markers or highlighters. Those aren't very good as the colors don't stick well to the wig fibers and they are too bright.
- *It is kinda hard to get the inkwell out so unless you have the patience, DO NOT attempt it, there are times that you would just have to completely break open the markers but there are brands that only require you to twist a certain part and you'll get the "treasure" inside. If you can't do it then ask for help.
- *Get more rubbing alcohol than you need. Make sure that the wig is completely submerged and is under the concoction. If not then not all parts of the wig will be colored evenly. Get the biggest ones and it doesn't really matter if the rubbing alcohol has moisturizer in it too, the brand is not an issue, just as long as it has that 70% on the label. hehehehehe
- *Please know that this is a messy process. Be careful, if you are gonna dye the wig indoors then cover the floors up with paper or plastic, or better yet, just do it outside. Do take note that there is also a risk dying your fingers if you do not use gloves. An example of this was when I dyed my Tsuruya wig. The green color was so hard to get off, I was so embarrassed on the day of the photo shoot, no matter how hard I tried, I still had greenish hands. I was so afraid that I would ruin the shots because of my green alien like nails and fingers heheheheh
- *It is also better if you get yourself a dyeing tub of your own, moms can be touchy about their tubs or palanggana. So save yourself from being scolded coz it is honestly tiring to scrub off the dye on your mom's good tub.
- *After letting the wig absorb the color, I then wash it off with cold water. Then I let it sit in water mixed with half a sachet of conditioner for like 15 minutes. I do this to make the wig smell nice.
- *AIR DRY the wig. DO NOT blow dry or sun dry, be patient.
- *It is best to dye light colored wigs to dark. It is much tougher if you insist to turn a dark colored wig to a lighter one. Best to dye whites, silvers, light blondes or in general just light colored wigs.
- *The outcome is great! Saved me lots of times already hehehehe Just be warned that there is also a chance that after wearing the wig for a couple of hours you'd have colored necks or hairlines if you don't wash out the wig enough. Do not fret, they are easily washed off if you take a shower. heheehhe =)
- *If you have all the time in the world, there is another sharpie method. What you basically do is get a hell lot of Sharpies, grab some of the wig's fibers and color them on by hand. Repeat the steps, this one is very tiring though. heheheheheh XD
My success stories:
Chii of Chobits
Tsuruya of the Melancholy of Haruhi Suzumiya
Fire Lily is nice and awesome, check out more of her cosplays in her DeviantArt.
Head on over there and thank her for making this tut!
*******************************
thanks for reading!
jaa! visit me again, ne!
arigatou! (*^3^)/~
FACEBOOK PAGE : http://www.facebook.com/jaroukasama
WORLD COSPLAY : http://worldcosplay.net/member/jaroukasama/
INSTAGRAM : https://www.instagram.com/jaroukasama/
DEVIANT ART : http://jaroukasama.deviantart.com/
TWITTER : http://twitter.com/jaroukasama
WORLD COSPLAY : http://worldcosplay.net/member/jaroukasama/
INSTAGRAM : https://www.instagram.com/jaroukasama/
DEVIANT ART : http://jaroukasama.deviantart.com/
TWITTER : http://twitter.com/jaroukasama


4 Comments
Wah you found the same tutorial pala XD That's what I did with my Queen Esther wig. Ot's originally bright neon pink but I managed to color it in red with the help of that tutorial :D
ReplyDeletehaha wow. pwede pala mangyari un haha. nice
ReplyDelete@nanami: hahahahahha it's a very nice tutorial =)
ReplyDeleteooooooh nice, grabe pla talaga effort mo sa cosplay na un, makes me even more proud of you! /hugs
@ishi: yes, effort lang talaga katapat minsan XD
This worked well for me :)
ReplyDeleteI wanna ask something though, how did you revert back the softness of the wig without stripping off the color? What conditioners did you use?
TIA! :)